• Welcome to 2 STROKE WORLD .net.
 

News:

MSRs 78 400 , My hybrid and a random German tractor


Main Menu

Reassembly White RZ

Started by Kawtriplefreak, February 02, 2025, 10:02:20 PM

Previous topic - Next topic

0 Members and 1 Guest are viewing this topic.

Vincenthdfan

Quote from: m in sc on March 21, 2025, 12:36:52 PMyou can use the adapter at 90 degrees from the arm and supposedly will need no conversion.

Hmm, interesting...thanks.  :like:

1976RD400C

Here's how I did mine. Tightened the nuts a little at a time in the correct order. Then you can get a socket on one of the nuts on the back. Using a torque wrench, tightened it to 18 ft. lbs. Then put the 12mm box wrench on it and "felt" what 18 ft. lbs. feels like. Did the rest of them to the same "feel".  :eek:
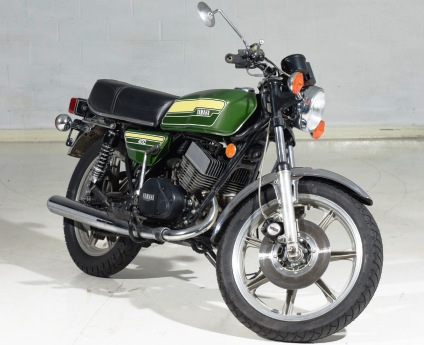
'76 RD400 green  '76 RD400 red   '84 RZ350

Kawtriplefreak

#32


Today the cylinders were installed and the Wicked ATV billet power valve coupler. Lubed the power valve cables, reinstalled the cable mechanism and hooked up the battery to verify neutral light and power valve operation. Then I started the Wicked ATV billet o-ring head install prep. I installed the thermostat and housing sealed with Permatex water pump gasket sealer and Permatex Anerobic on the cylinder base gaskets. Installed the Koso water temp sensor.Thanks M in SC for the phone consult.

m in sc


Vincenthdfan

Quote from: 1976RD400C on March 21, 2025, 03:17:22 PMHere's how I did mine. Tightened the nuts a little at a time in the correct order. Then you can get a socket on one of the nuts on the back. Using a torque wrench, tightened it to 18 ft. lbs. Then put the 12mm box wrench on it and "felt" what 18 ft. lbs. feels like. Did the rest of them to the same "feel".  :eek:

That was my plan as well...great minds think alike.  :thumbs:

Vincenthdfan

Quote from: Kawtriplefreak on March 22, 2025, 12:15:23 AM

Today the cylinders were installed and the Wicked ATV billet power valve coupler. Lubed the power valve cables, reinstalled the cable mechanism and hooked up the battery to verify neutral light and power valve operation. Then I started the Wicked ATV billet o-ring head install prep. I installed the thermostat and housing sealed with Permatex water pump gasket sealer and Permatex Anerobic on the cylinder base gaskets. Installed the Koso water temp sensor.Thanks M in SC for the phone consult.


I sure like the looks of that fan you have mounted on there for peace of mind in traffic.

Having water cooled dirt bikes over the years, I know first hand what a difference a good fan makes in keeping a bike from boiling over.  :thumbs:

Kawtriplefreak

R6 cooling fan wired direct to the battery with a switch on the LH frame rail under the tank. $50 used on Ebay. Switch was under $10. It cools it right down in traffic.

Vincenthdfan

Very nice idea on that fan, may need to try that.

rodneya

Quote from: Kawtriplefreak on March 22, 2025, 04:53:15 PMR6 cooling fan wired direct to the battery with a switch on the LH frame rail under the tank. $50 used on Ebay. Switch was under $10. It cools it right down in traffic.

I wired my fan through a manual switch and a temp controlled switch that fits in between the rad fins so that it turns on and off automatically.


Kawtriplefreak


Big shout out to my good friend Frank B who showed up this morning and we got after it. The Wicked ATV billet head went on without a hitch snd we torqued it to the prescribed 21 foot pounds in two increments.
Next up was the Vitos billet intake. We prepped the reed cages and applied Permatex anerobic sealant to the gaskets and rubber intakes.

We test fit the carbs only to discover the set back from the intake made the Canadian 29L cable too short and the cable adjusters were hitting the frame. Luckily I had the throttle cables from Economy Cycle made for aftermarket carbs and some straight cable adjusters from Niche Cycle. The supplied oil pump cable was too long so we took the oil pump cable off the 29L cable set and swapped it in and were able to rig the oil pump cable correctly. The setback and cable change required a cable re-route as shown down the right side and middle of the frame. We temp fitted the gas tank to ensure no clearance issues and all is well. Next we put the chamber spigots on the new exhaust stud kit from Yambits. The included self locking nuts are a nice touch. Then it was on to the radiator install. I filled the system with coolant and had a seep from the quick drain impeller cover and the Koso temp sensor. I drained some coolant and Teflon taped the sensor, retourqed the sensor and the drain plug, kicked the motor over a few times to distribute the coolant and called it a day. Thanks again Frank B!
Tomorrow's plan is painting the chambers and cleaning up all the tools.

Kawtriplefreak

#40
Paint day in the outdoor paint booth behind the shop. Power valve covers stripped, centers polished, masked, bead blasted, blown clean, wiped down with acetone and painted with 500 degree Duplicolor Ceramic caliper paint.

Attempted to paint FPP Chambers with Duplicolor 2000 degree paint like the spigots but it quickly became evident that the remaining Rustolem 1200 degree BBQ black would have to be stripped as the two did not play well together. So I wiped the light coat off with  tack cloth soaked in acetone then scuffed that chamber with 360 grit wet or dry tri mi followed by another acetone wipe and tacked it off.

Applied 3 coats of Rustolem 1200 degree BBQ black and all is well.


Installed new oil lines as the existing lines no longer reach due to the set back of the Vitos intake. Then I synced the carbs and installed the chain.

Test fitted this Wicked ATV aluminum oil pump cover a gift from my dear friend Evans Ward. Thanks Evans. It is far superior to the factory plastic cover. I am going to bead blast it and either polish or clear coat it to match the intake as suggested by M in SC.
Hopefully in a few more days I will get to hear it run.


Kawtriplefreak

#41

Chambers on. Spigots sealed with high temp sealant.

Repacked and cans reinstalled. The plan is initial fire up tomorrow on premix to verify oil pump operation and 1st heat cycle.

Kawtriplefreak

The White RZ Lives!!! :olaf:  :olaf:
Thanks to M in SC, Frank B and all the rest who helped make it possible...
https://youtube.com/shorts/vujwOywn2qg?si=aGqkWREy3Cz5eHe_

SoCal250

Congrats! :clap: I bet that feels good. Getting close to being able to rip down the road
75 Yamaha RD125B   75 Yamaha RD125B (project)
75 Yamaha RD250B   75 Yamaha RD200B (project)
73 Yamaha RD350     77 Yamaha RD400D   79 Yamaha RD400F  
91 Yamaha TZR250R  89 Yamaha FZR400   05 Yamaha FZ6   
05 Yamaha XT225TC  82 Honda MB5  02 Aprilia RS250 Cup (sold)

Kawtriplefreak

Thanks!
Another heat cycle after head bolt retourqe and then a test ride.