News:

Deals Gap Parking lot triage, looking at sunroofed #2:


This year:  May 5-12th.  25th year!
(CLICK IMAGE FOR MEET INFO)

Main Menu
Menu

Show posts

This section allows you to view all posts made by this member. Note that you can only see posts made in areas you currently have access to.

Show posts Menu

Topics - SUPERTUNE

#1
Turning Wrenches / Turn signal advice...
May 17, 2020, 09:49:42 AM
Ok it's time to replace the stock oem turn signals on Paul's RD400.
What have you guys done for descent conversion without the big $$ stuff?
I just took them off on my Yellow Screamer 20 years ago...
Don't care if we lose the self cancelling.
Thanks
Chuck

#2
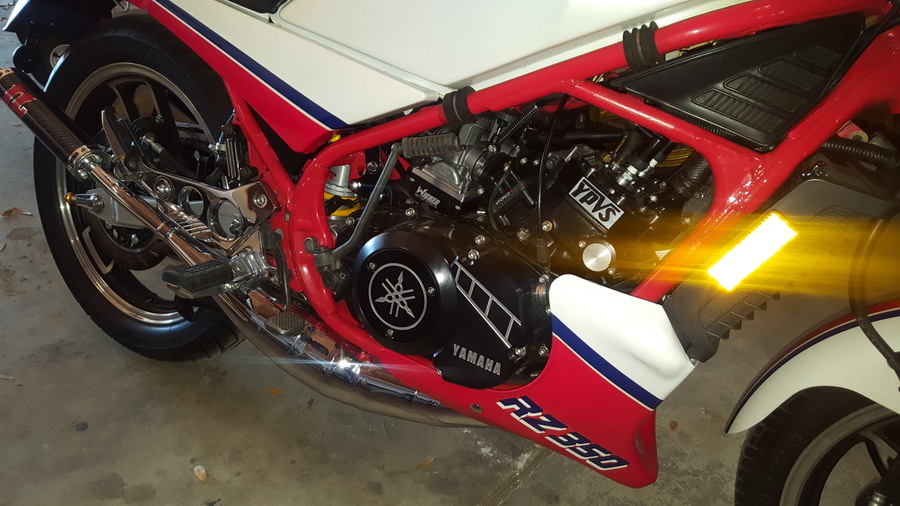
Pretty '84 RZ 5mm stroker 392cc


Close up of engine.


Going to work on showing some of the issues to RZ tuning and working with the Zeeltronic's PCDI-10VT

The job started with having to rebuild the harness and the main ground go shorted out and had to strip it all the way up to the spider ground joint up by the coil.


Because this engine is a +5mm stroker and even on stock stroke RZ's the first thing you have to do with using a programable zeeltronic controller is you have to verify the static angle and set the stator and the box as being the same static angle.
Basically what this means is the zeel (short for Zeeltronics) uses the max static angle to use as a guide to retard timing for your curve that you program in the box to what timing in degrees and what RPM to use that timing. With a static angle set @ 34* degrees that will be your max ever setting for any timing you use, 34* is a stock setting the zeel has in their box as stock.
But can be adjusted if you don't want to move the stator to match the 34* degrees, lets say the stator is 31* then you can go and program in the zeel box to only 31*'s  OK lets just move on for now...don't want you to get all confused.

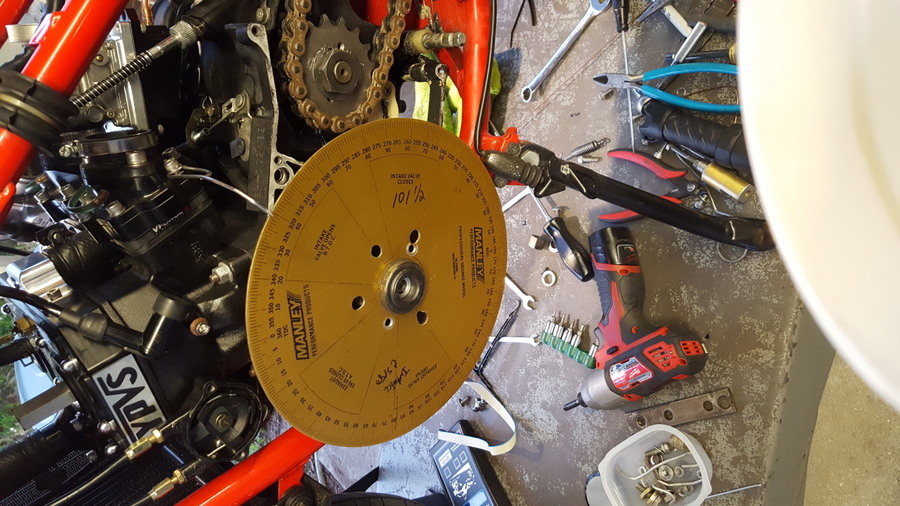
The first thing I needed to do is make a degree chart using a piston stop and degree wheel on the 5mm stroker engine (59mm stroke) as the 34* degree mark will be different than a stock stroke crank (54mm stroke) when using a sparkplug dial indicator.


The piston stop is put in the sparkplug hole, then turn crank with degree wheel on and turn back against the stop both ways and adjust degree * wheel and pointer so when against the stop in both directions the pointer reads the same on each side of TDC (top dead center) this now tells us the degree wheel is timed to TDC exactly. Now I can take out the stop, put my dial indicator in to measure piston movement and write out a chart as shown in this next pic and stopping at my 35* static angle # with my chart as no need to go any farther as I won't program my zeel box any higher than 34* static angle.
(sorry it's sideways)


TDC with both dial indicator and degree wheel @0


In this pic you can see all the timing marks I put on the flywheel with a pointer to use the timing light on.


By following my chart I see that 34* degrees is 6.26mm BTDC (before top dead center)
This 6.26mm what I now will make a pointer on my flywheel to use a timing light to verify and adjust stator to line up to have the static angle match the zeel box @34*

I took a perfectly good expensive Snap On 10mm combination wrench and married it to my acetylene torches and bench grinder to make a RZ perfect stator wrench so I didn't need to pull the flywheel to get to the bolt heads to loosen and move the stator to time!  :eek: :celebrate:


Here is my zeeltronics programmer...about $100


This was a bit on the fly trying to do this by myself with social distancing!!! :bang:   
Watching the programmer read RPM's and timing and made sure I have set all the curve points to 34* beforehand.

https://photos.imageevent.com/supertune/robrz5mmstroker392cc/20200316_165303.mp4


#3
Tip of the day series... making a piston stop, garage style.

So, Matt texted me today needing to torque on his Vape (powerdynomo) cdi flywheel bolt.
I did cover this in my CDI install, where I suggest to take off the clutch cover to hold the pinion nut, but he didn't have another side cover gasket as I think he said he glued it on and was running out of transmission oil.
So I said to use a piston stop in the left cylinder then time and torque the rotor bolt in.
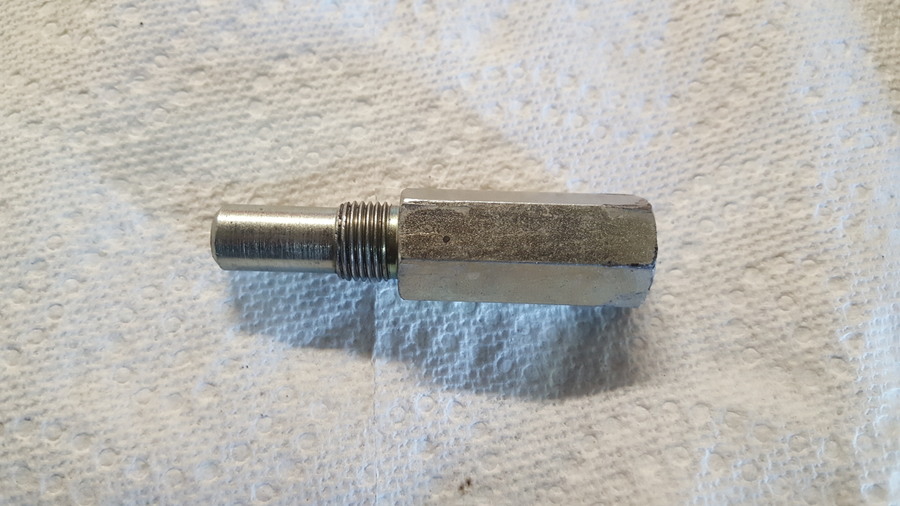
This is the one I have for this task...


So I decided to make a piston stop from scratch real quick for a garage down and dirty one in 20 mins...
Matt has a RD350 so I used a old B8HS sparkplug and used my sizzler wheel to grind off the ground strap.


Looked around the shop and found a piece of aluminum thick wall tubing that was 5/16 od in size about 1 1/2 long.
(can use a solid rod too... your going to drill it anyways.)


Put it in my drill press and drilled it out to clear the porcelain...


I used a 7/32nd drill bill and drilled it about 5/8 inch deep, (just looked at it and guessed)


I was in a hurry so I used JB weld quick to paste in the plug and the drilled end on the tube I just drilled and pressed it in tight in the vice.
( use std JB weld and wait overnight)


Make sure you keep the epoxy off the threads...
Let dry and now you have a homemade piston stop!


Chuck


#4

  Tip of the day...

Take time to chill out with your closest buds in life at this moment in dealing with COVID 19.  :eek:
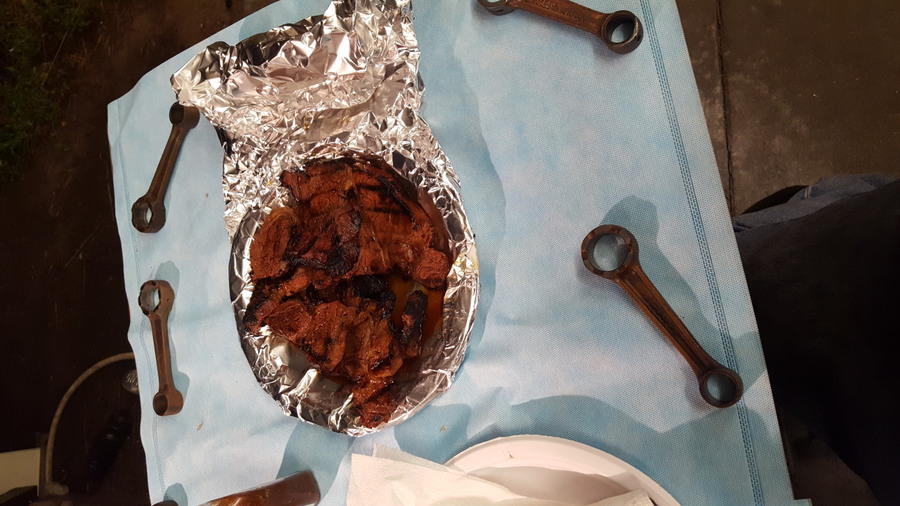
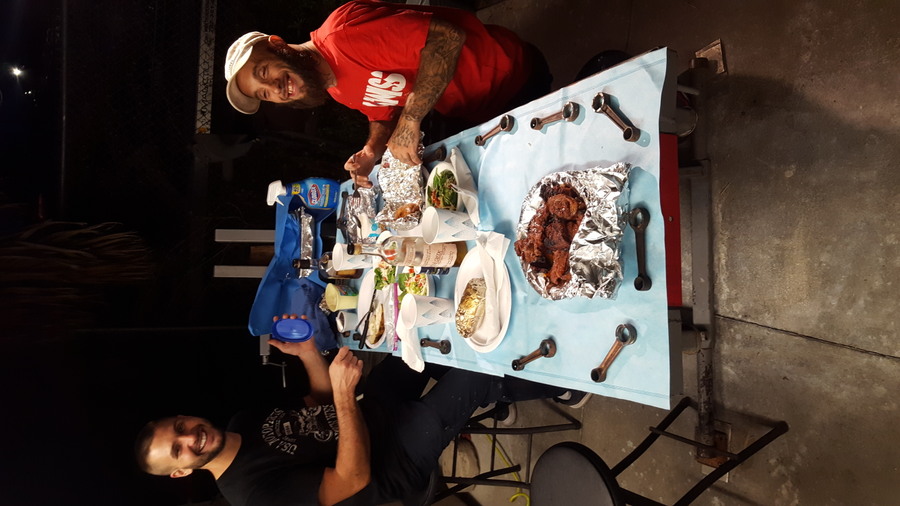
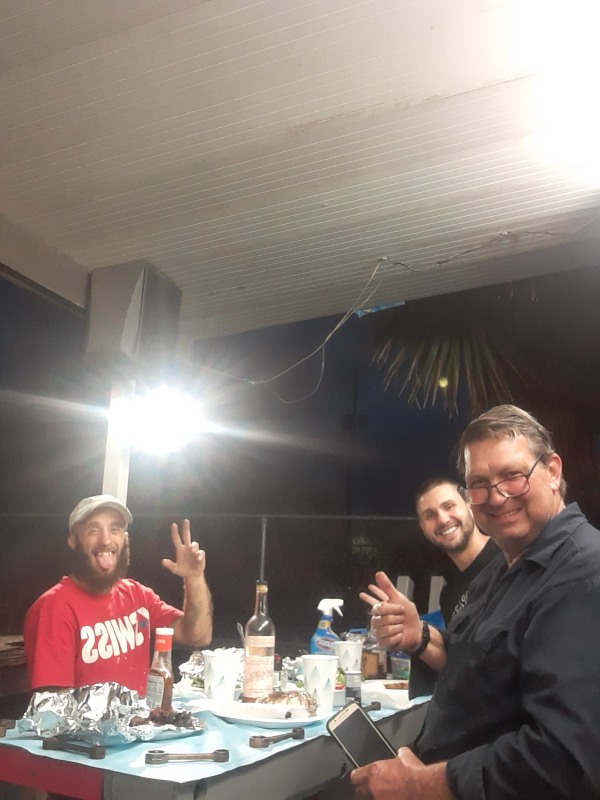
Have a shop style dinner on your motorcycle lift with surgical sheets and some Overnight Marinated Charcoal Grilled Steaks & Hickory Smoked Ribs!   :clap:


Don't forget to add the fresh spinach salad withsome Annie's Shiitake Sesame Vinaigrette, a twice baked and smoked baked potato, covered in butter, sour cream, fresh stone ground pepper, and always use organic grown hand fresh chopped chives...OOH don't leave out the Pan De Agua (Puerto Rican "Water Bread") toasted with Salamida Original State Fair Spiedie Sauce and some good ole' BBQ beans...


Add in a little Kentucky Bourbon and calm your mind with friends sitting on shop stools and pneumatic adjustable roller seat!


Then hits the streets out front of the shop and blow off some steam...OH I mean FIRE with your flame thrower!!   :toot:


Just don't stress out...just keep it safe and fun!!


Chuck


Chucks Steak Marinate 

#5
Tip of the day...

Most piston and ring manufacturing company's use OEM standards to make parts fit.
If Yamaha states the bore is 64.00, the piston and ring parts are made to fit in that size of bore.
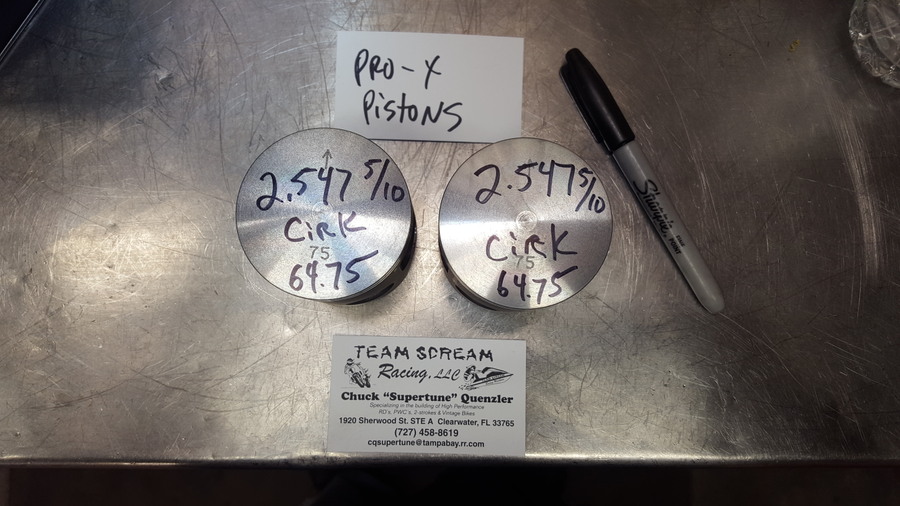
When bored oversized lets say 65.50mm the piston clearance is built into the piston sizing, so a cast Pro-X may have .0018 clearance, but a
Wiseco forged piston will measure .003 clearance in the same bore. A forged piston will need more piston the wall clearance to expand.
This way Piston Ring tolerances can be followed! IMPORTANT!
For every .001in bore size larger, the ring end gaps will get bigger times PI, which is .00314

I have found through 35 years of building RD aircooled engines I do set the piston to wall clearance for the job, type of piston, what bore the piston is and what brand piston is.  OEM Yamaha, Pro-X(Banshee), Wiseco, and Wossner are all different piston clearances.

Example....If I bore a stock RD 350/400 1st over @ 64.25mm with a Pro-X banshee piston and the bike is stock I'll set piston to wall @ .0019 for today's fuel. (never follow stock spec's unless your going to use canned race fuel)
If the RD is a hotrod, cut heads, aftermarket heads with pipes I'll be .0022
If the same mods but at 65.75mm bore I'll set clearances to .0025 for the thicker pistons that will need more running clearance.

Wiseco and Wosser pistons will follow suit, but using greater clearances due to being forged pistons.
No need for a Wiseco/Wossner forged piston in a stock bike unless a race bike like a Historic Production Class that will have the snot ran out out it for everything it will give you...
stock and update porting engines builds Cast Pro-X are fine.
Most of my stg 1 builds it's optional on cast or forged pistons, with stg 2 and up to full race porting, I only use forged pistons and even do
piston coatings to strengthen them of to be more fool proof ( like opp's I missed the jetting this morning and didn't hurt it in practice)

In Guillermo's setup @ 66.25mm bore, using uncoated pistons, it's perfectly happy at .0035 with a good warm up before a taxing run.

Chuck

http://www.2strokeworld.net/forum/index.php?topic=1720.0
#6
Tip of the day...

Always check with John from Economy Cycle for his pre-fab bolt-on ready to go lines first. He may have what you need.
https://www.economycycle.com/

Summit is your friend for custom brake lines parts.

I buy a #3 female on the line ends, then buy the the ends with the degree banjo you want. Russell and Earls are the popular brands.
Don't buy the chrome banjos, just the plain ones as you can clamp in a vice with hardwood and hit them with a mallet and get a little bit of a different bend. (called endurashine) Not Stainless, as they are pricey and I haven't tried to bend them.


Chuck

https://www.summitracing.com/search/brand/russell-performance/part-type/powersports-brake-lines/universal/yes?SortBy=Default&SortOrder=Ascending&N=universal%3Ayes%2Bfitting-size-1%3Aminus-3-an

https://www.summitracing.com/search/brand/russell-performance?SortBy=Default&SortOrder=Ascending&N=part-type%3Abrake-fittings
#7
One of the issues I see quite often when rebuilding customer engines is the piston to wall clearances are a lot of the time too excessive.
Even on somewhat freshly done cylinders without a lot of miles.

I have found that pistons that have a break-in coating adds to the problem and proper measuring equipment.
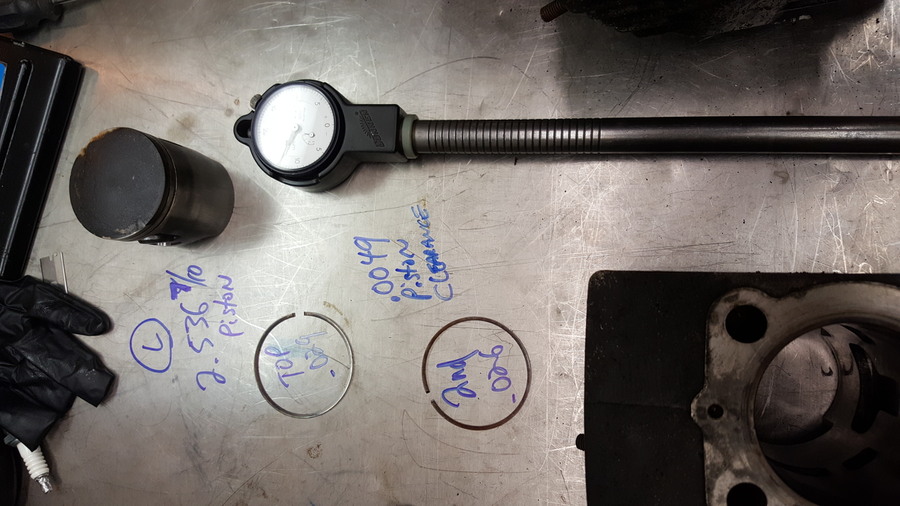
Because these coatings wear off fairly quick (about 800-1200 miles) and adds clearance, as the coatings are about .0008-.0012 than the actual piston will measure.
Use some medium green Scothbrite to rub off this soft coating to get the the piston measurement location and usually is at the bottom of the piston skirt as shown in the pics.


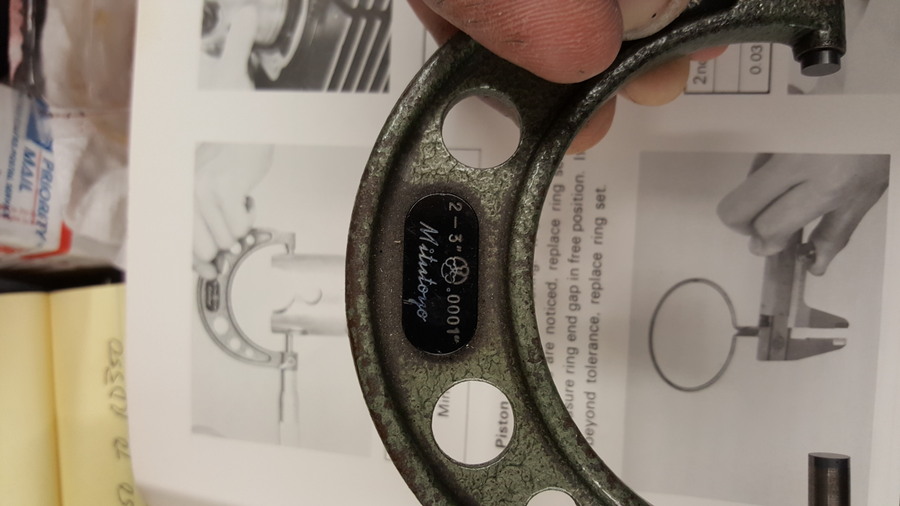
I even use a Mitutoyo micrometer...same as Yamaha uses other than mine is inches measurement!


Here's a measurement of Dave T's low mileage cylinders (1800)  .0049 was the reason his topend was noisy.


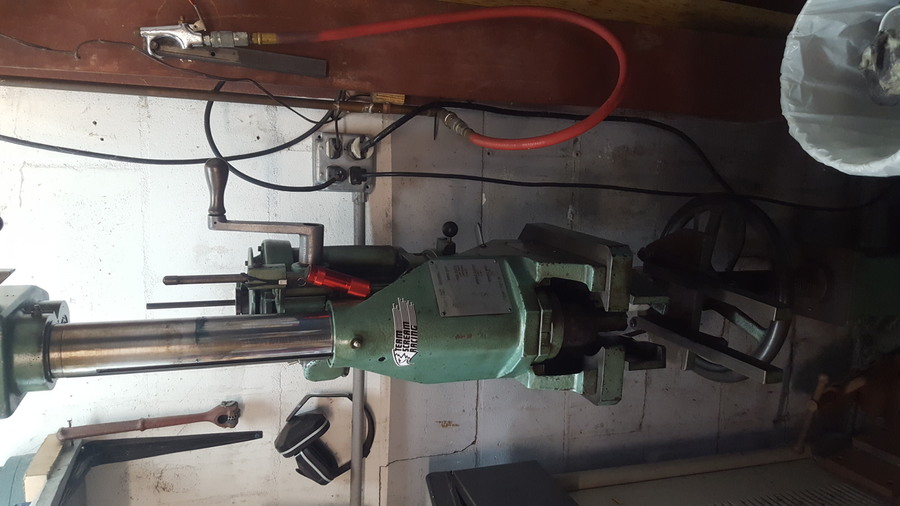
So a trip to the Rottler boring bar that I bought brand new in 1981 when I was 21 yo! (Yes... it's my left arm)
I can tell you exactly how bad the previous machinist did work, as I can see how crooked bore a lot of them are.
Mine still cuts within .0005 in. all the way down and will cut to within .0002 with the setting fixture to bore size.


Another issue besides noisy topend and high risk of cast piston breakage the jetting and performance was horrible when the ring gaps are huge
and causing blowby into the crankcase!!


4 Pokes don't get hurt as much with blowby as it just normally vents to atmosphere, with a 2 stroke the charge in the crankcase is the next power cycle and you don't want spent exhaust blowby there as it's kills power very bad and will be hard to set the carb jetting correctly.
I always say...how hard and far can you run with a plastic bag on your head?
So many RD's that has tuning/jetting issues in the past were non existence after a proper bore job and ring seal with less rocking and tighter ring gaps.


My pricing is not as cheap as most shops... but due the the time I spend, my equipment and desires to make all my bore jobs be bored and finished honed to only the next size up to save your cylinder bores life as you don't want to ever resleeve RD cast-in cylinders.

Here's Dave's finished piston clearance @ .0019


Final finished cylinders...


Chuck


#8
General Chatter / The unusual fastest drag bike!
March 09, 2020, 10:59:45 AM
This was really unusual method of power...Fast and clean.


C
#9
On RD crank rebuilding, there are options to go to better bearings for the connecting rod replacing both stock upper and lower needle cages.
With stock engines modified up to air filters and aftermarket chambers only... stock bearings are fine.
Once you add cut heads or aftermarket heads, porting, big bore pistons, bigger carbs, aggressive ignition curves and any more advanced power adder's I would recommend with these upgrades on the rod bearings.

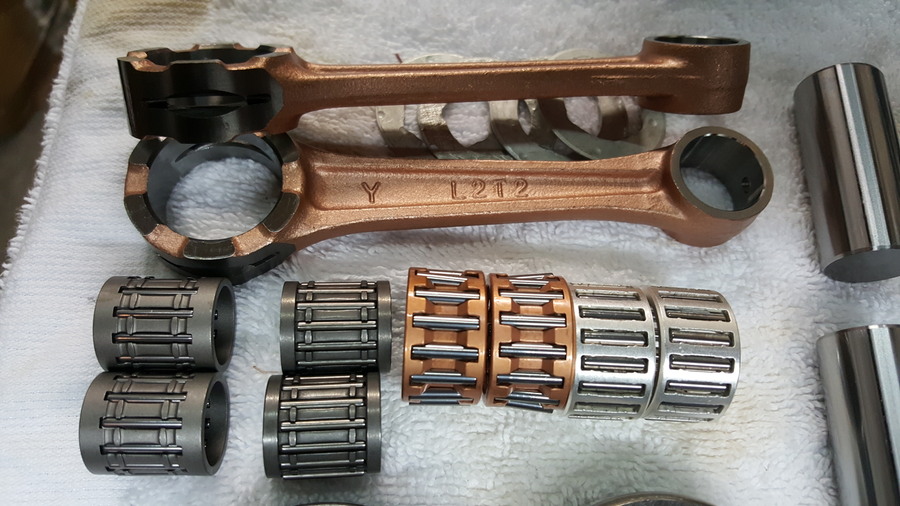
In this pic, the wristpin bearings to the left are stock RD type. These in the pic are Pro-X replacements and are exact copy's of stock OEM Yamaha just like the Wiseco's as well.
The Snowmobile ones I use for upgrade's have 2 more pins and 1mm longer for much better load handling in higher HP in RD engine setups.
Years ago we were able to use OEM Kawasaki H1-500 pin bearings that were like this, so was the LA sleeve H1's.... but are not available any more and with the supply market now when you order for an H1, they give you the RD type as it is the same fitment in physical size.
I was able to find a supplier 2 years ago, but have to pre-order 100 qty at a time. When I get down to about 10 on the shelf I place another pre-order for 100 more.

The lower rod bearing is also another weak link on the stock RD rod assembly with the stock lower rod bearing having 14 needle pins and the upgraded RM125 has 17 pins, the pins are 1/2 mm longer and are in a much stronger flat silver plated cage that doesn't crack like the stepped Yamaha type (Pro-X and Wiseco) that is copper plated.

So this has eliminated any rod failures in our race motors. When we did have a crank failure, it was always the rod bearings first...since using these better/stronger bearings now the cranks are lasting longer and when we do have a crank failure it's always a main bearing now. 

Chuck


#11
Team Scream / Tip of the day series- RD400 rear brake
February 28, 2020, 09:18:01 AM
Tip of the day...
RD400 rear brake caliper and master cylinder tips.
When rebuilding the caliper, clean the seal grooves really good to remove rust build up under the seals which causes the pistons to not move freely.

ANYTIME when using compressed air to remove pistons always wrap in heavy towels... and point down or as Mark suggested to do it in a bucket to be safe!
Other tips from Mark here:  http://www.2strokeworld.net/forum/index.php?topic=1619.0

Most RD riders are not needing the wiper seals in the pistons like Yamaha used, Yamaha made them to ride off road and all servere road weather conditions, I would rather not use the wiper seals and just rebuild it every 5-6 years to make it work very well.
Just assemble with the single thick seal. Polish caliper pistons with fine semi chrome polish to clean well if not severely pitted.

Use the OEM Yamaha rebuild kit to use the special red grease that comes in the kit to pack in the groove before you put the seal in.
This will prevent rusting under the seal for long life of the caliper pistons sticking.

If using a stock rear RD400 master cylinder you must take out the brake fluid supply line fitting out of the master cylinder and make sure the tiny hole is clean. There is 2 under there going into the piston bore.
That tiny hole will cause the brake caliper not to retract all the way, then drag and build heat, then seize.


Layout of order of the piston internals.


Always use new pads and throw the anti-rattle shims in the trash and don't use them!
EBC for stock bikes and SBS pads are great, I prefer the SBS for a more aggressive pad set.
Check disk for runout anything over .015 in. is not good.

I should add this also...due to the OEM RD400 master cylinder rebuild kit no longer available from Yamaha (part # 1A1-20000-50-00)
When needing to rebuild the RD400 rear master cylinder, use a OEM Yamaha FJ 1100-1200 kit but re-use the stock RD shaft/piston and not the FJ shaft.
All your using is the rubber parts from this kit.
Yamaha Part # 2YK-W0042-50-00 about $50.

If not a track roadracing bike... use a Dot 5 silicone brake fluid and will stay corrosion free and not remove paint when getting on refinished parts.
This works well...


Fancier ones...

https://www.amazon.com/slp/dot-5-brake-fluid/mpx3dwz7eggh64b

For roadracer use Castrol racing dot 4 LMA


Chuck

#12
Events / FMRRA roadracing for winter series
December 21, 2019, 01:26:27 AM
So some of my vintage local racers got in touch with Tony at FMRRA last year and discussed putting some vintage classes together to race in their races.

So 3 new classes were created to run Vintage classes with their Roadrace classes.

https://www.fmrra.com/

Modern Vintage Max race with 2 classes amateur and expert. (modern '83 up up to '94 I think)

Vintage Max (up to '82)

Vintage Light (up to '82)

I'm still learning the classes ,as this past weekend @Homestead Miami Speedway I went to crew chief for my locals and tune Dave Baldwins '74 RD350 I helped him build last year.

It was my first event as they started the 1st race of the season last month at PBIR (Palm Beach International Raceway)

(to be continued...)


#13
Team Scream / RD 7 plate clutch upgrade and other info
December 08, 2019, 11:48:23 PM
So after a lot of confusing posts lately with RD/R5/DS7  6 and 7 plate clutches I went and pulled some stuff down from upstairs to document better.
I define them by the # of fiber plates, 6 or 7 fibers.
Here is a DS7 250cc far left, R5 350cc center and on the right a mid '74 and later RD 350cc. (Same as the RD250 other than primary gearing changes)


Let's start with the DS7 / R5 / mid '74 and earlier RD350  6 plate clutch setup... 
This 6 plate clutch has what I call a spider inner hub and flat pressure plate. Outer baskets are the same other than the DS7 (one type of gear) and the RD250 (another type of gear) (with the 250's using a lower primary gear ratio than the 350's and 400's) and all off the rest RD350's and 400's (3rd gear type) I need to do more measuring on ratios for them later...

Spider early inner hub in 6 plate clutch.
In this pic I have the thick backing plate on it, but not pushed to the back against spider fingers.


Pushed back here.


This inner hub has some broken off spring bolt bosses/posts and is junk...but still will show type.

This plate is the thickest of the steels in a 6 plate clutch setup that uses 6 fibers and 7 steels.
The thick plate measures about 2.22mm thick. (might be 2.20mm as this one has a little rust)


On the early DS's and R5's and some 6 plate RD350's didn't use a input bearing 3 bolt retainer bolted in the cases right where the 1st thrust
clutch washer goes in.


RD late 350's and 400's with 7 plate clutches used the 3 bolt retainer shown here...


#14
Team Scream / 'How To' JL pipe mod
November 16, 2019, 12:10:49 AM
OK,
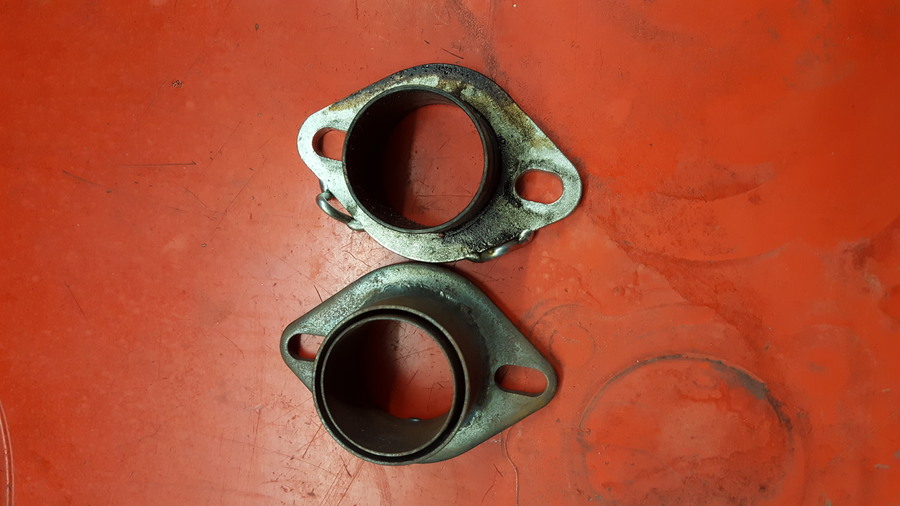
Here it goes... I'm doing a JL pipe mod 'How To' to fix the stupid design flaw these crappy headpipe seal are with just a single pipe with a silicone red/orange high temp o-ring that lays in a cut groove are too small and just chaffe themselves in a very short time, then start leaking so bad that our high performance RD run like crap and puke oil all over.

Major issue is the loose fit in order to be able to run a o-ring squished in there when installed.
I even glued the spigot joint with Ultra black and let dry for 2 days, was solid as can be.

Pic #1... it only took about 125 miles on Mikes RD350 to burn out joint and o-ring completely.

This is the byproduct of making power....


So my brain went to work and hurt a bit thinking what to do.
Do I cut out the headpipe flange sleeve, bore the flange, then machine a new sleeve a lot closer the the spigot size on the pipe and delete the o-ring?
(way too loose and the pipes wiggle and wear out the o-ring)

Do I just get a new silicone o-ring and glue it up again and then make a tail support back at the silencer up to the frame with a motocross pipe hanger to keep the pipe from dog tail wiggling?

Now wait a minute...let's look at other pipes that don't have this problem.
What do they have different?
Oh, they have a double pipe flange that Gary uses at Spec 2, my old Bassani set has and my custom Steve Turner pipe have...
like this:


#15
General Chatter / ATV collection
November 14, 2019, 08:31:45 AM
Another one guy collection...
Not a racer like Charlie Mavros was with his collection, Charlie's collection was not a museum, like this one is.
https://www.youtube.com/watch?v=JwXoCLBp55A
Chuck
#16
General Chatter / Jerry wood auction in Tampa
November 08, 2019, 07:57:03 AM
Huge auction tomorrow in Tampa on the Charlie Mavro collection.
Just unbelievable one man's collection...a  George Barber type!
Going to the preview today...
Chuck

http://www.jwoodandcompany.com/

https://www.youtube.com/watch?v=dZuX35GmnzI&feature=youtu.be
#17
There were a lot of posts lost out on this subject with the passing of the old forum.
Here is a post of a recent discussion.

http://www.2strokeworld.net/forum/index.php?topic=1112.0 
#18
Team Scream / HPI Install RD
October 28, 2019, 08:29:17 AM
There's not a lot of HPI install info I could find.
So this is what I went through for Mike's RD350.
He brought me his bike together but no wiring on the bike as the stock harness was taken off.
Mike did have everything mounted with the cdi and regulator.
I added lots of engine and frame grounds, then built a bare bones harness for just lights, brake lights, high and low headlight, charging system and tach power.

The hard part was where to set initial static timing as the HPI website showed setting it using a scale whether using clockwise or counter clockwise rotor rotation.
#19
Team Scream / 'How To' Yamaha oil pump testing
October 24, 2019, 08:43:37 AM
Here's some info on Yamaha pump testing using a cover to mount pump, some accessories with a cordless drill to see if your rebuilt or pump is working correctly.

Here is a '84 RZ350 pump off Brian Baldwins 350.


Video link:

https://photos.imageevent.com/supertune/rd400enginebuildpics/20191015_113338.mp4


#20
The YZ250 clutch fiber plates are wider than stock RD fiber plates. In RD stock clutch pack they come with rubber cushion rings that are placed in at the same time as the fiber and sit right inside of the fiber.
They were supposed to help the clutch have smooth engagement and dampen clutch rattle. Worked just ok when they were new stock powered bikes, now they're 40 +years old and the rubber are rock hard and with a good running engine and not new... the old clutch plates don't have a chance of not slipping.
By using the YZ250 or Yamaha FZR 1000 plates you throw the old rubbers in the trash and these plate take up the space where the rubbers were and now you have much more friction surface x 7 plates is so much better and you don't have to go as crazy with real stiff racing Barrnett springs.
Just a set of aftermarket 10%-20% springs do very well and won't kill your hand pulling in the clutch lever!

Chuck

Stock plates.


YZ250-FZR 1000 plates.